2 people found this helpful
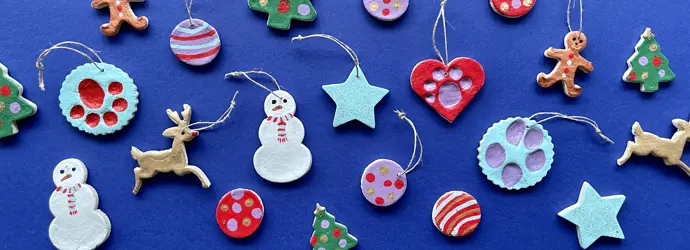
Homemade decorations always get the most attention from guests at Christmas time, and they’re the ones you’ll love bringing out year after year, for many festive seasons to come. Salt dough Christmas decorations are great fun to make, and you’ll be reminded of those precious family memories every time you hang them up on the tree. Learn how to make the salt dough itself, how to decorate your ornaments, and how to store them safely between festive periods with the help of Cushelle below.
How to make salt dough Christmas decorations: the recipe and method
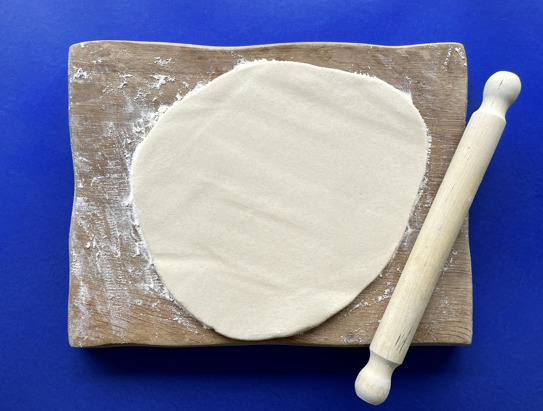
First things first, you’ll need to make the dough itself. It’s a really straightforward recipe that just requires three ingredients: plain flour, table salt, and water, in the ratio 2:1:1. You can either measure this with cups, or use the amounts below:
- 250g plain flour
- 125g table salt
- 125ml water
The method for making the base for salt dough tree decorations is straightforward too:
- Pre-heat your oven on its lowest temperature (this might be around 80-100°C).

- Mix the flour and salt together in a bowl, add the water, and stir until they come together to form a ball. Knead a little, if necessary, to get the desired texture.

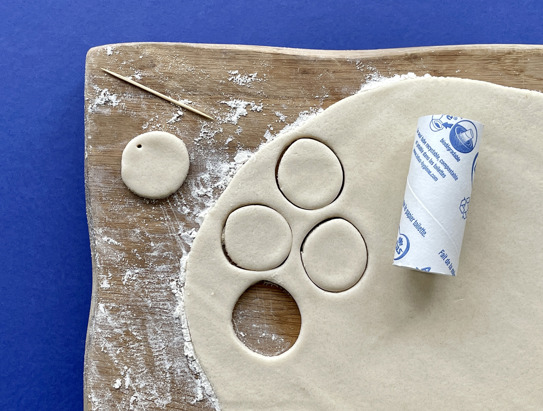
- On a floured surface, roll out the dough.
- Cut out your shapes, remembering to poke a hole near the top (using something like a skewer, pencil or toothpick) so you’ll be able to hang them on the tree. Why not use empty Cushelle toilet roll tubes to cut out regular circle shapes?
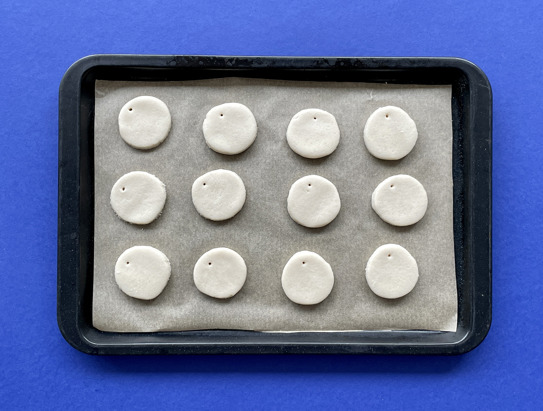
- Put on baking parchment on a tray and bake for 2-3 hours until solid. Remember that thinner dough will set quicker. Leave to cool completely.
Once you’ve cooled your dough, you’re ready to decorate. But before we get to that, let’s consider what shapes you might want to make.
Salt dough Christmas decorations: the shapes
The most natural shapes for salt dough Christmas tree decorations are the typical festive figures. This could include things like:
- Snowmen
- Gingerbread men
- Christmas trees
- Reindeer
- Robins
- Stars
- Santas
- Baubles
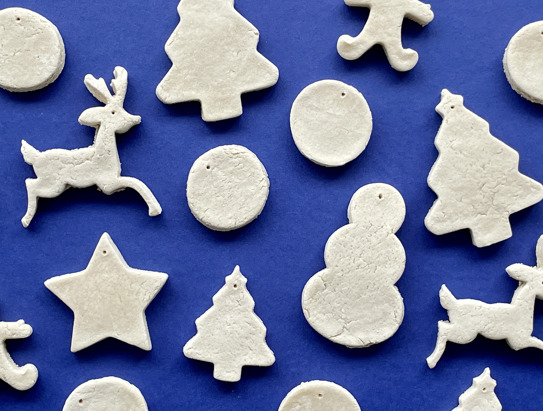
It is easiest to make these shapes with a set of Christmas cookie cutters. As the dough is made of edible ingredients, you can use the cutters again for your real cookies.
Don’t have any cookie cutters? No problem! Use the strong cardboard inner tube of Cushelle toilet paper as a handy circle to make round shapes perfect for baubles.
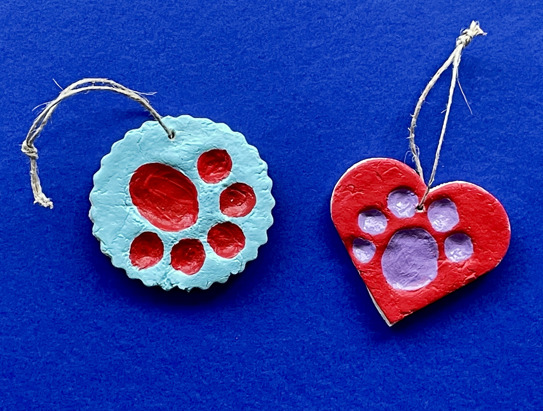
Keepsake salt dough Christmas ornaments
Want to make extra special salt dough Christmas tree decorations, perhaps to celebrate your baby’s first Christmas? Then how about making adorable handprint or footprint ornaments? It’s surprisingly easy!
Before you cut out the shape, press your little one’s hand or foot in the dough to make an indentation. Make as many as you want. Then you can cut the shape around them – a simple oval or circle works well. After baking and cooling, highlight their prints by painting them in bright colours, leaving the background plain.
You’ll treasure these for years to come, and they make beautiful presents for Grandmas and Grandpas. Enlist the help of older siblings to make some homemade Christmas cards to accompany the presents and get everyone involved!
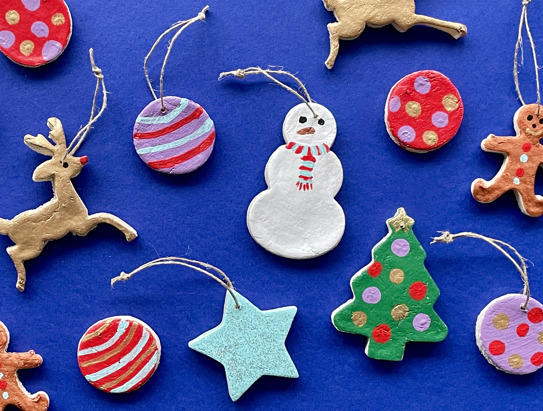
How to paint and display salt dough tree decorations
Once your dough is completely cool, you can start to paint. Acrylic paint is a great option, but only for older children who won’t put it in their mouths (or chuck it all over the table!).
Keep it simple with one colour or get creative with patterns. If you want to use multiple layers of paint, let the first layer dry before adding the second. You can even try adding eco-glitter to the wet paint or doing finger painting to create a dotty design.
Once the paint has dried, you can preserve your decorations by adding a layer of clear acrylic sealer.
To hang your ornaments, simply slip some thin ribbon, twine, or string through the hole at the top and tie it a double knot. Hang it anywhere on the tree. You could add a cast of festive toilet roll characters underneath your tree, as well.
Does your tree have room for a few more decorations? Try out some more of our homemade Christmas tree decorations to bring extra sparkle to your home and fill a rainy afternoon.
How to store salt dough Christmas ornaments
Use a sturdy box to store these precious decorations safely between festive periods. Stack them flat, one on top of the other, with bubble wrap between each one.
Now that you know how to make salt dough Christmas decorations, all that’s left is to decide what shapes and paint effects you’re going to try. And to help you count those long days before Christmas, why not make our homemade village advent calendar?
Did you find this article helpful?Thanks for your feedback!
or
Related articles
Fast and easy Christmas craft ideas to decorate your tree
Get into the festive spirit with these amazing Christmas crafts! From loo roll Santa to a glitzy Christmas tree, find something your kids will love here.

2 Easy Pom Pom Crafts: Making pom poms with wool
Learn how to make pom poms with cardboard and wool using empty toilet rolls and empty boxes. Making pom poms with recycled materials is easy when you know how!

Festive toilet roll Christmas crafts for kids
Prepare to get crafty this festive season with these two step-by-step tutorials for making DIY Christmas decorations with toilet rolls. Discover our tips here!

How to make toilet roll puppets: easy steps for kids
This easy tutorial shows you how to make a puppet with string, paint and toilet rolls. Puppet making for kids is simple with these DIY toilet roll puppets.

2 scarily simple Halloween crafts for kids
Looking for Halloween craft ideas for children? Read this step-by-step guide on how to make spooky spiders and a haunted house.

How to Make Paper Flowers
Follow our simple paper-flower-making tutorial to learn how to make paper flowers at home. Click here to discover how to make a paper flower.
